Sunday, March 11, 2007

Backside of the medallion


After inspecting the backside of the H-apron, it seemes to be quite some work needed to make this baby shine again =)

Saturday, March 10, 2007

Nice ass


A well formed rear end is never wrong in any way. The rear apron of a classic beetle is no exeption. As seen in the pictures posted on the zwitter, the car had a modern rear apron mounted at some point. This will of course be changed for the well known H-apron. These are not easy to come by, and to find an uncut example is almost impossible. Repro versions are on the marked, but there is always something about the real thing. After a tip from Fürsten, I collected a H-apron last night, although in a cut version. Having no experience in restoring this piece, it looks possible to reverse it back to a solid apron. Some pictures of the operation will follow.

Thursday, March 08, 2007

Inside right side


On this side I did a little twist to the welding of the ouside channel. Because it was more solid than the other side, I made a more solid overlap weld. As you see in the pictures, there are still some pices to make.

Wednesday, March 07, 2007

Repeating procedures


To get the corner aligned again, I used measuring points from the other corner to get the pieces right. I started with the outer channel, and the cut the bottom part and tack welded it in place.

Corner nr. 2


The right side corner of the front heaterchannel, was even worse than the left. After cutting out the rusted pieces, there was not a lot of intersection points left. On this side the front wall was rotten on the underside all the way up.

And wholaaa...


Sometimes it's better to act than think to much... In this case the result came out better than expected. Porsche sparewheel wide 5? Formel-Vee? Classic racing? E-bay?

Thursday, March 01, 2007

Struggling through


It's surprisingly not the funniest job at all times to weld, weld and weld... To get inspiration to start again, day after day on removing rust, it's important to have some visions of the project.

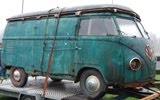
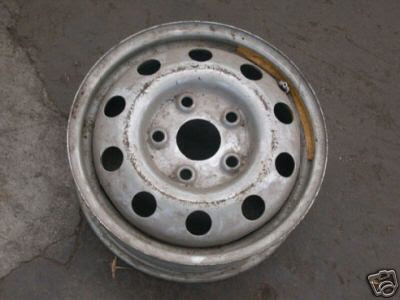
And a very important issue of a project is the wheels. I have many ideas in my head, and one of them is spinning around the wheel shown in the picture. This is a 911/912 Porsche wheel, and would fit an outlavws car quite nice... keep on dreaming =)

The outside corner


Here is the result of the outside corner. It may not be professional, but with some sealing of the welding and grinding of the surfaces, the result will be good enough to last another generation. I think the most important procedure will be the rustproofing inside the channels. This frontpiece welded in, will be exposed for hard conditions, and therefore I painted it with "weld through" paint on the inside of the channel.

The next corner


Hopefully the tricky parts will be easier to make on the next corner. Can you spot the intersection point on this corner? It's not easy to make these parts without measuring from a other car. Buying the channel bottoms from Wolfparts has been great help. Just three more corners to go.....

The first complete corner


The extention of the front wall and bottom piece, was a tricky part to make. But after several cardboard models and testing, the pieces seemed to fit. Of course it's easier to make the cardboard models when you have two splits to compare it to. After adjusting a little bit, the final piece was welded in. And then we have the first corner of the car rock solid. A little more welding and grinding needed to get the paint-ready finnish.

Towards a personal milestone


It has proven to take some time and skill to weld up the heaterchannels to look as good as stock. After fitting the heaterchannel bottom last time, the contour of the corner came back. First step was to extend the front side of the front wall, and to make and weld in the inner channel.