Thursday, April 12, 2007

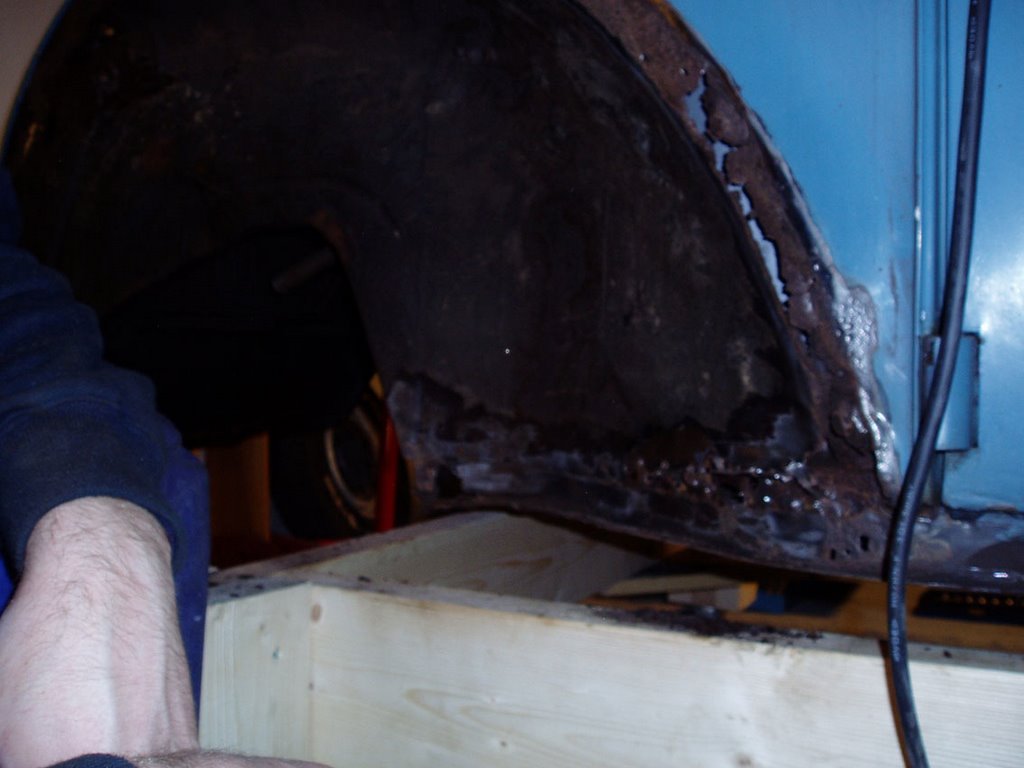
A lot of air


This picture helps to make the decision of using danish steel even easier =)

Rear right corner


This is far whorse than the left rear corner. Nothing is left of the rear corner, and heavy surgery is needed. To get to the rusted area, the heater tube under the rear seat had to be removed. I cut it in a way that the top cover will hide the welding when finnished. The job now is to find out where to cut and replace with fresh metal. Here I see no other way than to use some danish metal to replace the rusted area. It's to huge for me to create, as there are few ends to meassure from.

Starting out back


Some exitement was certainly present when it came to removing the rear fender. After struggeling with both the front fenders, I expected nothing less here. But surprisingly it seemed that all the bolts and the fender had been removed at some point before, and the bolts could be removed by hand.

Right front corner


Some progression is visible on my project, but not as much as hoped. But the timewindow for this car is wide, and I'm in no hurry. Bulding piece by piece, the front end is becomming more solid each day. The regulator on the welder broke last nigt, so I didn't finish welding the last two pieces of the corner. But there is only filling of spotwelds and grinding left before anti-rust treatment and painting.

Sunday, March 11, 2007

Backside of the medallion


After inspecting the backside of the H-apron, it seemes to be quite some work needed to make this baby shine again =)

Saturday, March 10, 2007

Nice ass


A well formed rear end is never wrong in any way. The rear apron of a classic beetle is no exeption. As seen in the pictures posted on the zwitter, the car had a modern rear apron mounted at some point. This will of course be changed for the well known H-apron. These are not easy to come by, and to find an uncut example is almost impossible. Repro versions are on the marked, but there is always something about the real thing. After a tip from Fürsten, I collected a H-apron last night, although in a cut version. Having no experience in restoring this piece, it looks possible to reverse it back to a solid apron. Some pictures of the operation will follow.

Thursday, March 08, 2007

Inside right side


On this side I did a little twist to the welding of the ouside channel. Because it was more solid than the other side, I made a more solid overlap weld. As you see in the pictures, there are still some pices to make.

Wednesday, March 07, 2007

Repeating procedures


To get the corner aligned again, I used measuring points from the other corner to get the pieces right. I started with the outer channel, and the cut the bottom part and tack welded it in place.

Corner nr. 2


The right side corner of the front heaterchannel, was even worse than the left. After cutting out the rusted pieces, there was not a lot of intersection points left. On this side the front wall was rotten on the underside all the way up.

And wholaaa...


Sometimes it's better to act than think to much... In this case the result came out better than expected. Porsche sparewheel wide 5? Formel-Vee? Classic racing? E-bay?

Thursday, March 01, 2007

Struggling through


It's surprisingly not the funniest job at all times to weld, weld and weld... To get inspiration to start again, day after day on removing rust, it's important to have some visions of the project.

And a very important issue of a project is the wheels. I have many ideas in my head, and one of them is spinning around the wheel shown in the picture. This is a 911/912 Porsche wheel, and would fit an outlavws car quite nice... keep on dreaming =)

The outside corner


Here is the result of the outside corner. It may not be professional, but with some sealing of the welding and grinding of the surfaces, the result will be good enough to last another generation. I think the most important procedure will be the rustproofing inside the channels. This frontpiece welded in, will be exposed for hard conditions, and therefore I painted it with "weld through" paint on the inside of the channel.

The next corner


Hopefully the tricky parts will be easier to make on the next corner. Can you spot the intersection point on this corner? It's not easy to make these parts without measuring from a other car. Buying the channel bottoms from Wolfparts has been great help. Just three more corners to go.....

The first complete corner


The extention of the front wall and bottom piece, was a tricky part to make. But after several cardboard models and testing, the pieces seemed to fit. Of course it's easier to make the cardboard models when you have two splits to compare it to. After adjusting a little bit, the final piece was welded in. And then we have the first corner of the car rock solid. A little more welding and grinding needed to get the paint-ready finnish.

Towards a personal milestone


It has proven to take some time and skill to weld up the heaterchannels to look as good as stock. After fitting the heaterchannel bottom last time, the contour of the corner came back. First step was to extend the front side of the front wall, and to make and weld in the inner channel.

Thursday, February 22, 2007

Front corner


At last I got some speed on the welding again. During one evening I managed to finish up the inner wing and started working on the heatercahnnel. I replaced the bottom part with goods from Wolfparts, and made the rest by papercutting and fitting before welding. The bottom and outer side of the left channel are now OK. Just some grinding and welding needed to finnish it up. A good feeling to se things look like new again =)

Thursday, January 25, 2007

Strange things


Some new strange things about the zwitter appears for each time I look at it. Yeasterday I discovered that the when the car was rear ended, the fanhousing smashed into the firewall and made a dent. It popped out just by pressing it. Somehow the car doesnt seem to have suffered from it in other ways than body parts replaced on the rear.

Piece by piece


After a very satisfying session on the "El-capitan", I managed to make another welding piece for the front inner wing. The technique is improving, and it's showing in the details and tempo. The weakest link at the moment is the welding equipment, and for next welding session I think the welding-gas is bought in, and the powder-thread put on the shelf. I'can in some way see some kind of end to it now. Hopefully the welding is done by the summer.

Monday, December 18, 2006

Building up


I have a philosophy that it's smart not to cut the whole car to pieces before weldig it up again. Therefore it was satisfying to spend an evenening with the welder at last. My goal is to save as much as possible from the original car, instead of turning it into a danish "Veng-car". It didn't take much time before I saw the results of that. Welding into metal that containes small spots of rust, is not easy. The welded parts will probably not be as solid as new, but on the other hand didn't Wolfsburg treat the body against rust attacks. So with "nearly as new" welding, and modern chemical treatment, the car will last at least 50 years more. Being a "freshman" on welding, quite a few lessons were learned the first evening =)

Tuesday, December 05, 2006

Crackers


Removing the other front fender was quite easy, because most of the bolts followed the feder off the car. This side had the original cloth band between the fender and body. This side looked a lot worse, and some more extensive repair work is needed here. The picture show what needed to be cut out for a beginning, but the whole area underneath the fender mounting zone is all eaten up.
With good tools and a good attitude, this should be fun welding up =)