Showing posts with label Oslo Lysverker. Show all posts
Wednesday, April 28, 2010
"Rollin" BD shell
A winters work on my BD has now ended. The van is almost completely disassembled, and the shell is rollin on some new axles. The summer has set in and it's zwitter time. The schedule for this summer is tight, so the BD will have a rest until the snow is falling again. At lest the shell, there are plenty of pieces to cuddle in the summer nights. Hopefully next winter the project will hit a whole different paste =)
Tuesday, March 30, 2010
Barndoor - Tearing it down
Thursday, January 28, 2010
From green to grey

I read somewhere that the "green stuff" on the Klassicfab pieces where no good. But I tried both mechanical removing and to remove it with thinner. I think the quality of the green primer seems more than good enough. I cleaned off everything and gave it a second coating of grey 2k primer. It's easier now, rather than paint it after it's welded in place.
Tuesday, January 26, 2010
Musclebus delivery
I got huge package the other day containing some green stuff from South-America. I made a deal with Chris at Musclebus a while ago, and got great service from him. Now I can start to fabricate more of my own pieces, using some of the new metal as mallets. The BD is parked in a cold storage for the time beeing, so working indoors with preparations is prefered =) There is still a long way to go...
Monday, December 07, 2009
Reinforcements
A little inspired from the lessions at Norwegian Hammerworks, I had to find out what we could do with the tool in our garage. Bending metal shouldn't be that hard, so I tried some easy profiles for a start. Because everything is gone in the frame of the BD I measured as good as possible and made the two crossmembers. The one in front is already on it's way from south america, but I used it as a trial piece and I'll have it as a spare. The rear one worked out OK. I made them in two pieces, and will weld them toghether when mounted. I think I will have to do the same to the top hats, as my plan is to keep the cargofloor in the van. The 1,5 mm steel was about the limit of our tool for bending metal.
As for other progress, the gearbox and rear suspension is fully removed from the car. It's a painstaking job to take a rusted out wreck apart. Evertything is stuck beyond imagination...
Things brake and fall apart, but I try to keep up with fixing it instantly, as I did to the lever shock and door hinge.
Tuesday, December 01, 2009
Hinge repair

When I removed the passenger door from the BD the upper ear on the upper hinge broke off. I posted earlier that I was not sure what to do; replace or repair. Given the result from the lever shock welding, I figured I would give repairing a shot. I grinded all the edges to get a deep weld penetration, as the surface of welding was very limited here. I heated the pieces and welded with the door bolt as a guide. This also turned out well, and no visible cracks to be seen. I will settle with this repair, and now proceed with the rest of the repair on this door, and keep the original hinge.The weld seen across the hinge is some old repair with oxy-acetylen solder. Will take care of that later.
Lever shocks #2


The lever shock that I welded was operating OK, and the arm could be moved up and down. The other one is siezed, and I opened it up after cleaning it. Acording to the workshop manual, the shock should be filled with hydraulic oil, but the shock was completely dried out inside. I filled it with oil now and will let it soak for a while. If that doesn't do it, I will soak the entire shock in diesel oil. The cool thing about this shock, is that some of the original paint is hidden under the rust. It will be enough to get the correct color to paint them again. The welded shock will also be opened and oil-treated.
Lever shocks #1

As I have started to take the BD apart, there is a lot of parts that need attention. Among these are the two lever shocks, ancient rear shock absorbers. One of them was damaged and fell apart when I loosened the bolts. They are made of cast iron, and I was not sure if it could be fixed. But I followed the procedures for welding cast iron, found on the internet =). The trick, as I read, is to warm the two pices before welding, keeping it warm during welding, and cooling it slowly. I think the result look Ok, and hopefully it will be strong enough. I guess we have to find out the hard way... Covered it with some primer for storage for now.Wednesday, November 18, 2009
Attention to detail #2
Having a rental contract with Oval 57 on my work shop space, means that I have to suck up to him from time to time. Bringing him coffe and always agree on how important it is to put all your love into the project is some of the trouble I have to go through. As you probably know from reading his restoration blog on the 52 "capitan" split, the other members of Sechs Volt have claimed he has been sleeping with his Kamax bolts, rubber moldings and seat covers on several occations, unfornately without having any evidence for the claim. So to keep Oval 57 happy (and the rental contract fresh), I have decided to give the original seat covers a try. They have been resting in the forest for decades, so the softnes in the fabric is somewhat gone. But last night I carefully disassembeled the covers on the backrest, and took it inside and gave a good cleaning. And here I found another facinating detail for all the geeks out there... The little red tab shown in the picture, made from the same material as the seat cover but in red color. Sawn in at middle bottom of the backrest. A very important detail to adress if you have to make repro covers =) Here you also see a "before" picture of the seat. The main problem reusing this is a little shrinking of the material, and all the seams have rotted away. The frame is good and solid.We will have to wait for the outcome of this...
Attention to detail #1

I have read a lot of topics on Barndoor details at thesamba.com and other places. Last night I did some work on the passenger door, and found some funny details again. I knew the window frame on the door had a number punched in on top, and that this number somehow relates to the body number of the van. This means the doors were "one-of" from the factory. But what I found last night is that the hinges have the same number punched into them.This number is usually covered with metal, so you would have to remove the hinge to see it. My hinge is broken, so I had to get it out, and some old damage repair has to be redone (it has been welded at some point). The question is; repair the original stamped one, or replace it with another?
If all this numbering of doorparts should make any sense, the door it self should have the same number somewhere? Someone knows?
Wednesday, November 04, 2009
Pre restoration
Here are some more pre restoration pictures. It shows a relatively straight body, exept the roof wich is really damaged. The cargo area and cabin is in fair shape, but needs new panels in every corner. Unfornately the spare roof was needed by the previos owner, but I don't worry about the roof at the moment. That will be fixable, one way or another. But they sure look rough these forest wrecks as you pull them into the garage =)
Monday, November 02, 2009
The Oslo Lysverker Van - a real workhorse?
Oslo Lysverker had a lot to do with developing the infrastructure in Oslo. Part of the development was putting new power cables in the ground. These cables were heavy and the work of putting them in the ground was not a easy task. They could be up to over 500 meters long, and the trick seemed to be not to stop when you got the cable sliding. A known method from ancient times of making people work in the same paste, is song and rythm. At Oslo Lysverker they had their own singer, whos only job was to keep the cable sliding. His singing was supposed to keep the men pull at the rythm of his song. The movie clip is from a norwegian TV program in the seventhies. I wonder if my BD panel van was the vehicle the singer used to carry himself and his speaker kit around? The cargo area of my van is surprisingly straight for being a work horse for over 10 years. As you can hear from the clip, I recon this man in the turtle neck was not the most popular man among the dirty workers in the ditch. Singing his awful song day out and day in with his hands in his pockets. The "Oppsanger" as he was titled, got replaced by a machine who pulled the cables shortly after this interview took place. Wonder why?
If I got the "Oppsanger" van, it must have been the most hated vehicle in Oslo for many years... Now I just have to mount a speaker on the roof and fill the streets with song once again =)
Friday, October 30, 2009
The BDs History - part 4
I try to get closer to the layout of the OG lettering on the BD. It seems the government companies in Norway had some sort of standard for layout and color coding. Still looking for a picture of a "Oslo Lysverker" van, but so far the picture above is the closest I have come. The van in the picture was owned by "Oslo Sporveier" the company in charge of the subway, buses and trolleys in Oslo. As you can se from the picture, the two-tone painting is similar as on my van, but different color. This one seem to have white base with silver metallic sideline and front.Notice the black painted rims.
It also has a roof mounted spot light, and my van has a hole for one in almost the same spot. I also like the special logo in the nose very much. Cool details... and I feel these are small steps towards finding the documentation for the "Oslo Lysverker" layout.
Tuesday, October 27, 2009
Condition of the frame
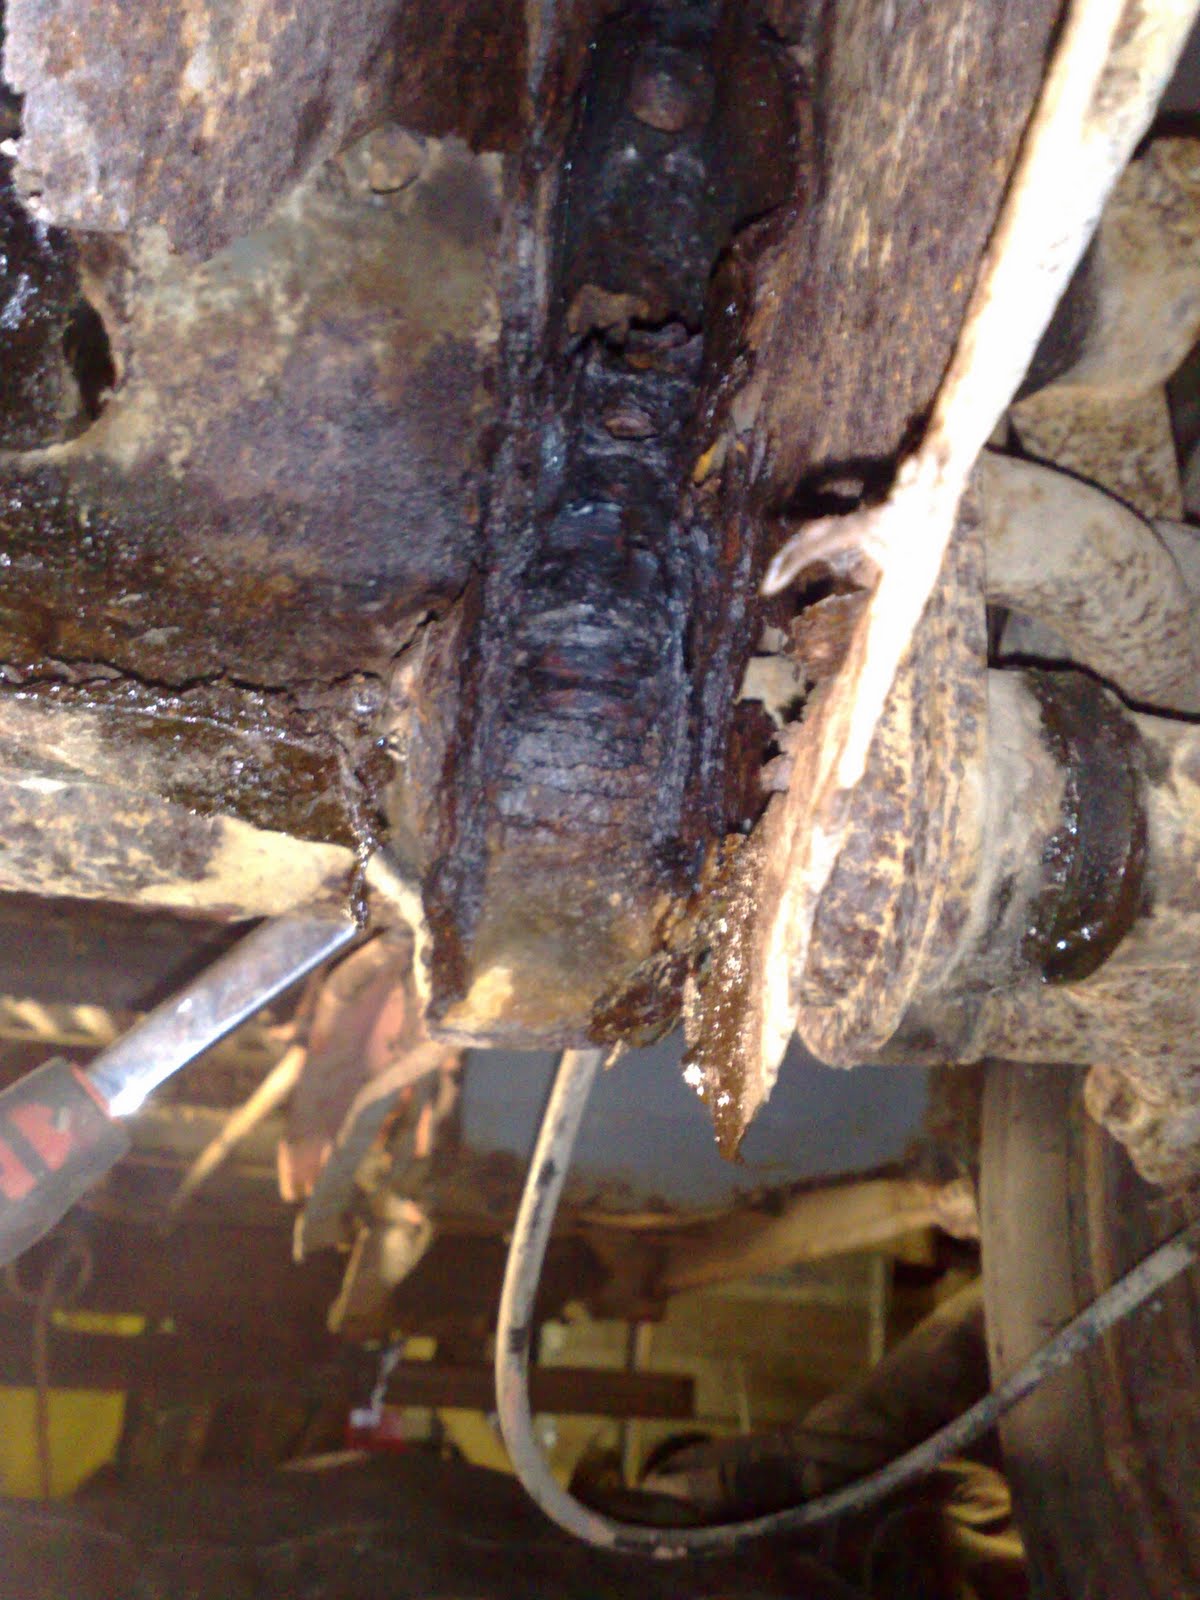
The frame of the BD is not in a good shape. The van is holding together in the sheet metal, because the main frame is broken on both sides behind the front wheels. If the body had been more rusted, the whole car would brake in half. So to reach the first goal of a rolling object, some serious welding is needed. First thing will be making the jig ready, and flip the car over on the side. Then strengthen everything, and start to cut out some rotten metal. I've already taken out a whole bucket of rust with my bare hands =) Some pictures to show what it's like under there...The usual cross members, outriggers, jacking points etc are by-gonz.
The BDs History - part 3

The van was purchased by Oslo Lysverker in September 2009 and served as a utility vehicle until 1962 in the same company. Then the van had 3 or more owners until it was parked in 1965. I can tell it had some surgery at some point, and my guess is that it was already very rusty in 1962 when it was sourced out of Oslo Lysverker. The frame has been welded, and some of it even repaired with body filler, yes(!) the frame. The engine support has also been changed at some point. But the body is remarkable straight, given that the car has spent almost 10 years in the city of Oslo as a everyday work horse. The picture shows the headquarter of Oslo Lysverker, with a yellow barndoor and some beetles parked out side. Seems to be be mid sixties?
Tuesday, October 20, 2009
The BDs history - part 2


Already revealed the factory paint and found a bright blue stripe along the side of the van, I had to check this against how Oslo Lysverker logoed their buses. And by a strike of luck, I showed the details to Splitman here in Norway. He could tell that he had previously owned a grey BD van with a blue stripe, and that the new owner had said something about "Oslo Lysverker" logo revealed on the van after he started working on it. This van is now being restored i England, but I have not tracked the owner down. Looking at the pictures above, there is a fair chance these two vans had the same paint and logo. The pictures was taken before the van went to England.
I have also picked up some rumors about a Norwegian VW enthusiast confirming to have owned a post BD with the same colors, also a former Oslo Lysverker van. He could be sitting on some pictures of the van that he owned many many years ago. I hope for the best..
The BDs history - part 1

I always think a cars history is an important part of it's current identity. And having followed the Kempes van on the internet, it's so cool to see how the roots of the cars life can be tracked down. I've barely started to dig into this vans history, but I got some allready.
When it left the Norwegian dealer Møller in september 1953 it was put in duty at Oslo Lysverker. This was the public supplier for electricity in the city of Oslo. The picture above shows the maintainance central for Oslo Lysverker in the period this van was in duty. You can easily spot at least two grey VW vans in the photo, one panel and one with windows. It could very well be in the picture...
Leaving Wolfsburg


This is what the panel van most likely looked like when it left the factory in May 1953. In september 1953 it left the dealer in Norway and got the first set of number plates. The color was L21 Pearl grey. The pictures are borrowed from www.Barndoor.dk.
Monday, October 19, 2009
Factory paint


After getting the panel van indoors, I have spent some hours to get to know the object better. The over all feeling is that the condition is what I expected. The frame is gone under the cabin, and som heavy surgery is needed to make it drivable. But to get the van redy for welding, there is a time consuming process to take everything apart. I started on the interior, taking out panels and stuff. The good thing about this kind of work, is that it gives some positive surprises. I have a feeling the OG paint on the whole cabin, and all the panels can be brought back to life.
As you can see in one of the pictures, the van was originally painted in grey, with a blue stripe along the side. The inside of the doors and cabin area also reveal the factory paint. The fuse box on each side still contains the paper inserts =)
Still a lot of things to take apart, and some of it are fragile stuff. More pictures to come as the work continues.
Subscribe to:
Posts (Atom)


