Thursday, January 25, 2007

Strange things


Some new strange things about the zwitter appears for each time I look at it. Yeasterday I discovered that the when the car was rear ended, the fanhousing smashed into the firewall and made a dent. It popped out just by pressing it. Somehow the car doesnt seem to have suffered from it in other ways than body parts replaced on the rear.

Piece by piece


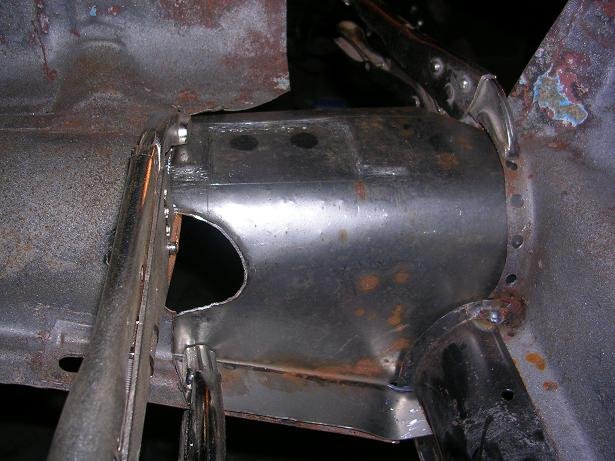
After a very satisfying session on the "El-capitan", I managed to make another welding piece for the front inner wing. The technique is improving, and it's showing in the details and tempo. The weakest link at the moment is the welding equipment, and for next welding session I think the welding-gas is bought in, and the powder-thread put on the shelf. I'can in some way see some kind of end to it now. Hopefully the welding is done by the summer.

Monday, December 18, 2006

Building up


I have a philosophy that it's smart not to cut the whole car to pieces before weldig it up again. Therefore it was satisfying to spend an evenening with the welder at last. My goal is to save as much as possible from the original car, instead of turning it into a danish "Veng-car". It didn't take much time before I saw the results of that. Welding into metal that containes small spots of rust, is not easy. The welded parts will probably not be as solid as new, but on the other hand didn't Wolfsburg treat the body against rust attacks. So with "nearly as new" welding, and modern chemical treatment, the car will last at least 50 years more. Being a "freshman" on welding, quite a few lessons were learned the first evening =)

Tuesday, December 05, 2006

Crackers


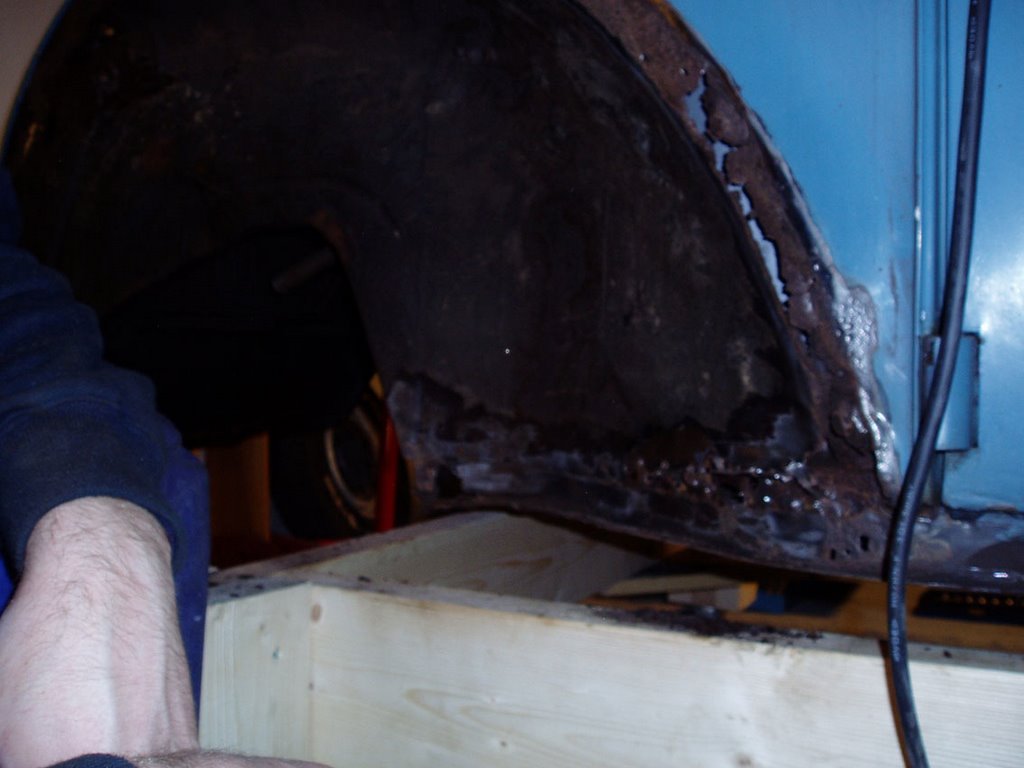
Removing the other front fender was quite easy, because most of the bolts followed the feder off the car. This side had the original cloth band between the fender and body. This side looked a lot worse, and some more extensive repair work is needed here. The picture show what needed to be cut out for a beginning, but the whole area underneath the fender mounting zone is all eaten up.
With good tools and a good attitude, this should be fun welding up =)

Thursday, November 23, 2006

Hipp, hipp hurray....


Not everybody would choose to celebrate their birthday in a garage. But just beeing an Outlavws member, already tells that I'm not "everybody". Powertools in combination with good friends, make the perfect surroundings for a perfect day. I must say that working on MY split window beetle in our new garage, is a dream come through. Sitting on a chair, in room temperature, whith all tools sorted on a worktable, is reason enough alone to celebrate. It's a real dream come through to whorship your hobby in these conditions, rather than sitting on your knees in thermoclothing outdoors in november. 31 years, the average age of a 1303... Really puts things in perspective =) (Thank you to the photografer for catching me in a good moment)

Attacking the front corner


After removing some welding nuts and making new threads for the front wing, I was ready to start on the heaterchannel repair. My knowledge of opening up and closing spotwelded parts is very limited. But after a little experimentation, the drilling and opening of the spotwelded outer side of the channel went well. Next step is to fabricate the new outer side and adjust it. Struggeling to think reasonable from time to time, I will also remove the left front wing and do the repair parallell on both sides. Seeing my slave (Fürsten) producing repairpanels like he never done anything else, I can see a shimmer of light in the tunnel of rust...

Finally some hammering


After beeing a "cruiser" for two seasons, and only working on "bolt on" options and fine tuning of my Ex Ruby Red, it was a relief to take a firm grip of the hammer and dolly again. The Ruby Red went through serious sheetmetal work on the roof and gutter, so the noise of the hammer and dolly felt somehow familiar to me =)
The Zwitter had a front incident at least one time, and the straightening job was finished when the hood could be closed.
After some massage of the inner wing, I only have to weld in some small pieces and it will look a lot better. Some small battlescars will still be visable, but that's just for the image =)

Thursday, November 09, 2006

Running board off


I tried the same procedure as on the fender to remove the running board on the right side. Here I ended up with one broken bolt, not too bad. Seeing how solid the heater channel was underneath, made me even happier. The welding job of the front end and the rear end of the heater channel does not look to bad. Some parts from Wolfparts are needed to complete this. The runningboard it self is beyond saving. I kept it to copy the support bracket, which is needed to get the authentic look to the new runningboards. This is heavily supervised by Fürsten, who does not allow any short cuts. I will obey =)

Fender off


I removed the OG zwitter trim from the body, and have stored it safely. They are really the pride and joy of the car, along with the OG window trim. Then I started to remove the front right fender. I have given all the bolts 3 rounds of WD40 since july. They all seemed soaked in rust solvent when I started today. To be sure I gave the bolts some heating, and some light hammering, before trying to turn them. The result was 2 loose bolts, the rest broke off. A little frustrating, but what can you do? The solution will be drillig them out, and try to etablish new threads. If not, I will drill out the spotwelds on the welding nuts and replace them. The fender it self need a little welding, but beeing a OG split fender, it looked very nice. Removing the fender revealed no surprises otherwise, and I'm happy.

At last - stripping down


Finally the day came, and I could open my toolbox and start working on my 52. There has been some hours put in to the club garage, and is was quite satisfying to start working in these surroundings. We still have some pices to get in place, but overall it starts to look like a real work shop. I started to strip of the bumpers, and found out that the car had an accident in both the rear and the front. It look like this happend in the 50 ies while the car was still Swedish. Maybe it was fixed up from a "wreck", painted and sold to Norway??

New kid in town


"This town ain't big enough for the both of us..." but the barn sure is =) Surprisingly big enough to fit several splits. Took off a little erlier from work today, to get a good look at the new purchase of oval 57 in daylight. He used the whole weekend driving to get get this split (and anoher one) home from the west coast of Norway. It sertainly look like he found a nice piece of machinery this time. The car is quite rusty, but oh so beautiful patina... I hear some whispering about Oval 57 driving around in a RAT looking split in the near future =) Of course, he has to learn "How to recreate 1/3 of a split beetle" before he can hit the road.

Tuesday, November 07, 2006

Engine building


Last winter I buildt this 1600 DP engine for my Ruby red 66. It was all stock inside with some collected 70 ies tuning parts. A weber DCN bolted to a Trimco manifold, a Mallory dualpoint distributor, a power pulley and a glaspack muffler and header was "bolt on" parts.
I also ordered a custom made chromed stack for the weber from Pierce manifolds in the US. Unfornately the weber didn't play along when I fired the engine a week before Bug Run. All parts was changed back to stock, and in the 12 th hour I found that the problem was a broken push rod. The time was not there to tear the engine down again, and I drove the whole summer with the stock setup. The car with the 1600 was sold this autumn. BUT all the good parts is still laying on the shelf, waiting to be used again. This time I'm thinking more in the direction of a 30 Hp to start with...(another posting on future dreams, awaiting the workshop to be completed)

Friday, October 13, 2006

Interior


The interior is painted in the same color as the body, but brushpainted with a rough finish. The radio is also a strange monster, likely to be replaced with something more OG. The plan for the interior is to grind the surfaces bac to OG standards, and repaint in L73. I will try to remove the blue paint with paintstripper, but am prepared to paint it all.

Small steps


Nothing much is happening to Zwitter these days, but next month I hope to get things going. Most of the time still goes to prepare the workshop. But small things are better than no action at all.
So now the doorpanels are removed and the vinyl cover peeled off.
Here you can see the result...

Tuesday, October 10, 2006

And some more inspiration...


I think this picture can make a grown man cry... There is something about the attitude and racing spirit =)

Starting the puzzle


I try my best to collect as much information as possible, before I start the process of welding the zwitter. The options for ready made weldingparts, are limited to a car this old. I have found some, especially from Wolfparts in Sweden, but think I have to fabricate some as well. Here are a couple of pictures borrowed from the net, showing home made pieces. I must say these look great. It sure give some inspiration to start hammering out some own parts.

Welding practise


It's always good to have something to reach for, something who sets a standard. I think this picture shows what a rustwelded corner can look like. This is my goal, and the furure will tell how it turns out =) I am in fact excited to get started on the welding.... Maybe not so excited when the struggle begins...

Inspiration


As we are getting our stuff together in the Outlavws workshop, there is a hope to start tearing the car down in a month or so. Meanwhile the days are getting shorter, and the time for collecting inspiration increasing. I have been lucky to see the Norwegian car "Thündersodder" a couple of times, and this car sets a new standard. I really like the vintage-race feel of the car.
The attitude Øystein gave this car really is a inspiration to me. I look at my own pictures and the Ultra VW story quite often. I'm not going to copy-cat this car by any means, but hope to catch some of the attitude. I will stick to a more "stock" appearance, because my zwitter has a lot of correct parts, that not will be replaced.
I once said that the goal for the project is to build a "50ies Cal-looker", meaning a "outlaws-cal-look" built like it would have been in the 50ies. But I know my projects always change a lot during the restoration period... stay tuned and see the result =)

Monday, October 09, 2006

Peeling of...


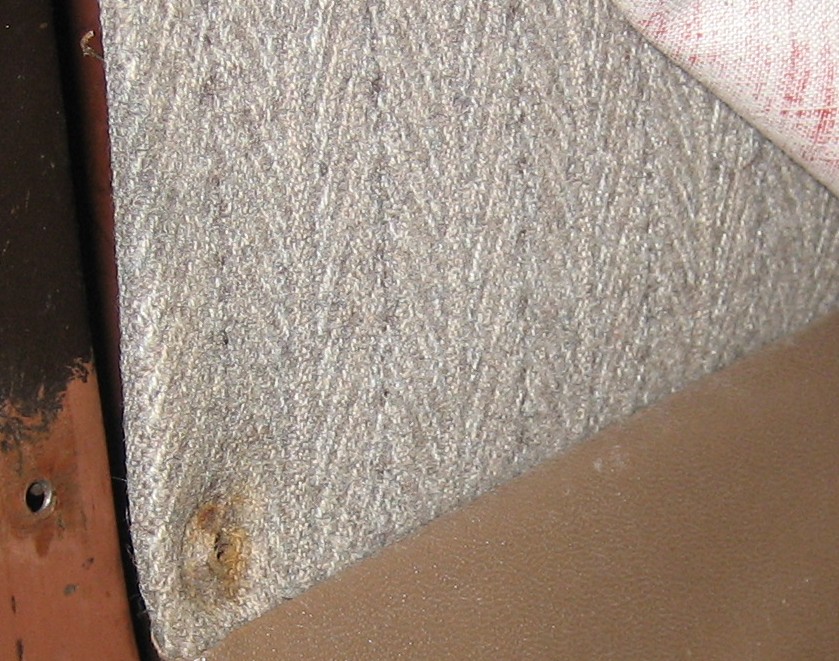
Purchasing a resto object is always exciting. The good moments when your expectations are forfilled, are really whorth the elbowgrease of some rust welding. The first positive surprise with the zwitter came when I discovered the original paint color. The second came when I understood that all the sidepanels had a vinyl cover, to protect the original whool covers. The vinylcovers have probably been there since 58 as well, and the OG covers underneath looks awesome. I can just imagine how this will look with the car painted chestnut brown and the brown fishbone interior....

At one point something went wrong...


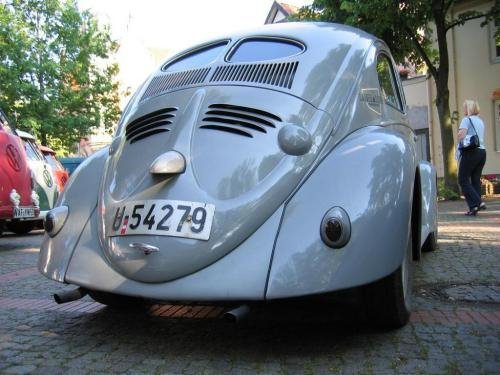
Very wrong I would say. It probably happend in Sweden around 58, just before the car was exported to Norway. At the time time Norway was short on cars, after a regulation period after ww2. Swedish cars were sold as "New" in Norway after going through a make over. Blue seemed to be the color of the time, and were sprayed on this zwitter. There are a few other items as well, that probably was changed at the same time. A split front wing, split rear decklid, and turn signals on the front fenders are things that didn't come with the car. Luckily I think the older parts says something about the cars history, and are not going to be changed, except the turn signals of course. The car shown in the picture has the same color as the original zwitter color, L 73 Chesnut brown. I think this color will suit the car better... agree?